Monday, 28 November 2011

Crochet hearts

Last night I tried to make some

Crochet Hearts


for the Xmas tree, to hang on string as decoration, to make cards with or as wrapping paper decorations.

As my friend Abi, who is new to crochetting, asked me to teach her how to make crochet hearts, I tried various different version, in order to best show her next time I see her.
At first I thought it would be really difficult, but actually they are dead easy...
Even for very beginners.


Here is how I made them:

1. Chain (CH) 3


2. 2 x Half Treble stitches (HT), into first chain (this will make a row of 3 stitches, incl. the chain).
3. Turn and CH 2 (this will be your first stitch of the row).
4. 1 HT into bottom of CH, 3 HT into the next stitches (5 ST all together in that row).


5. Turn and CH 2.
6. 1 HT into bottom of CH, 5 HT into next stitches (7 ST all together in that row).
7. Turn and CH 2.
8. 1 HT into bottom of CH, 7 HT into next stitches (9 ST all together in that row).
9. Turn and CH 2.
 10. 1 HT into bottom of CH, 9 HT into next stitches (11 ST all together in that row).
11. Turn and CH 2.
12. 1 HT into bottom of CH, 11 HT into next stitches (13 ST all together in that row).
13.Turn. Skip 2 stitches. in 3rd stitch crochet 7 Double Treble (DT) stitches.
14. Skip 2 stitches. In the next stitch, make a Slip Stitch.
15. Skip 2 stitches. In the next stitch, crochet 7 Double Treble (DT).
16. Skip 2 stitches. In the last stitch of the row, finish off with a Slip Stitch (SS).
17. Finish off, sew the wool into your heart and cut any remaining strands off.


That's that.

They are so quick to make that I made a dozen last night, whilst watching
the X Factor Results.

Let me know how you get on.


heart

Saturday, 26 November 2011

A Fine Day for a Poppy

 Luca came home the other day, asking questions about war and why Dad had bought a paper poppy that he was wearing on his jumper.

I explained, as best I could, about what war meant... what soldiers do... and that in some countries, war was still happening.
Luca seemed fascinated by the subject (scary...) and wouldn't stop asking, rather gruesome questions, about it all.
Rather difficult to answer a 4 year old, without being too cut and dry about it.
War is bad. Soldiers are "good"? Sometimes people die... Gosh... 
How does one navigate such a subject?

So...

Inspired by the

Poppies

everyone was wearing for Remembrance Day, I thought I'd resort to being a bit "girly" about it all and whip up some of my own (adorned with sparkly beads, as I'm that type of chick!!!) to honour the soldiers we'd lost.


I found some fabulous red felt in one of the "junk" shops, which I accidentally washed at 40 degrees (without knowing it was wool felt), but the accident, turned into a blessing as it shrunk and gave the felt a thicker more unusual feel and look.

I cut out 12 petals (4 large ones, 4 medium ones and 4 small ones).
Sewed them together, layer by layer, starting with the small layer first, then added the medium layer behind and finally the large petals.
Then attached the broach at the back, with some super glue as well as some stitches to really hold it in place.
Covered the broach with another piece of felt.


Then sewed on all the little pearly beads, on the front of the flower. 

Some in cream/pearly (not very "poppy" like but what the heck!) 


and some in black/brown - more suited to this POPPY event.


I just LOVE them...
They somehow feel rather glamorous!!!


Friday, 25 November 2011

A card for Xmas

Last night Nina slept through the night for the first time.
From 8pm to 6.45am!
It was gift.
She's not been a bad nightime sleeper so far, but a WHOLE night... that was truly an early xmas pressie.
Fingers crossed it's not just a one-off experience, but one of many to come.

So, talking of Christmas pressies and as Christmas is looming ever closer (unbelievably so...)
I have decided to try my hand at making

Home Made Cards


I've never tried sewing on card directly, so this in my little attempt.

Great fun to make, freestyling on the sewing machine is pretty cool.
Had to practice a fair bit with tension on the machine, and after screwing on the embroidery foot for my sewing machine, I got the swing of it... foot down on the pedal and hands moving the paper around frenetically.
I don't think they look SO bad.

If you are one of my lucky "home made card" receivers, let me know what you think!

Here is how I made them, if you too fancy gracing your friends and loved ones with similar cards:


I cut out Xmas-sy shapes (using cooking cutters as well as free-styling) out of some felt I had left over. Then with some double sided sticky tape, I secured it to the card, before sewing the material onto the paper.
For the felt shapes I used an ordinary sewing machine foot.


Moving onto the writing, I removed the sewing foot and screwed on the Embroidery Foot - free-styled by moving the card up and down as required, but kept my foot down on the sewing machine... to get a constant flow of stitches...
 

Then in I added the final touches by writing something in thin black pen.


So... in true Xmas fashion...


And have a drink on me...
Cheers!


Tuesday, 22 November 2011

A Square Affair

As winter sets in, I am plagued with one cold after another.
I knew that after the high of JUMP premiering, I would come down with another lurgy...

So now I find myself on the sofa, with tissues on hand, hot lemon, fresh ginger and honey next to me, snuggled up under a heavy layer of wool, as I finish off crochetting this super warm

Hopscotch Blanket


In effect, it's a series of scarves stitched together (if that makes sense?), with a border around it.


Crochet Extravaganza


This particular idea was adapted from Dottie Angel's blog and instructions.
She is just a magician with her crochet hook.

Here is Dottie Angel's beautiful version:


In keeping with my own bedroom colours (sans doilies), I actually went and bought "proper" wool for this baby, this time.
Not the cheapy acrylic wool I buy locally, I sourced this gorgeous 100% Aran Wool by
Cascade bought online at Pavi Yarns.


Beautiful feel. Chunky wool.


And fairly pricey too... Only for special, special projects...

Sunday, 20 November 2011

Crispy love

When I was pregnant with Nina (and Luca for that matter), my one addiction and craving was for ready salted

Crisps
(potato chips to the non Brits).


I love love love love them.
Especially Kettle Crisps (I should be sponsored by them I eat so many!)

So, the other day, I attempted to make my own.

They didn't turn out to look as good as Kettles do
(I didn't have a big enough potato peeler, so I had to cut the potatoes in half)
but they were scrummy none the less.


Here is how I made them:

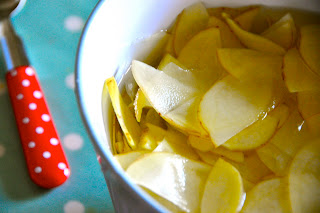
1. Cut 3 large potatoes (smaller ones would probably work better come to think of it), into thinnish slices. I used a potato peeler, but if you have one of those retro slicing machines (like my Mum does), then use that instead.
2. Place the sliced potatoes in a  bowl of cold water for about 30mins.


3. Take the potato slices out and lay them on some kitchen paper in order to dry them out and soak up ALL the water.
Top Tip: The dryer they are, the better they fry!


4. Heat up some Rape Seed Oil (or Sunflower Oil) in a pot (enough to dunk the potatoes in comfortably) until it is incredibly hot hot hot!!!
Top Tip: The hotter the better.


5. In batches of about 10 slices, fry them for about 2 minutes or until they turn golden brown.
Top Tip: They burn very quickly if you are not careful.


6. With a fork take the potatoes out of the oil and let them dry on a sheet of paper towel, so that all the excess oil is removed.


Sprinkle with Sea Salt and/or Pepper or Chilli Powder and
EAT!!!!

Thursday, 17 November 2011

A Pink Puffy Delight

 Leaving behind the world of film...


and entering back into the world of craftiness...

I INTRODUCE TO YOU

The Marshmallow Dress

This is a real girly overdose of pink and frills.
I overindulged a bit I think, but then again, I remember the tastes I had when I was little and it was all a pink over-the-top-ness.

Ballerina Madness


Taken from the easy-peasy gorgeously tasty book
by Rob Merrett


(which has 25 patterns for funky cute clothes - definitely worth the price!)

This is the last of my pre-birth-of-Nina dresses, made in my sewing madness week end.
A few more patterns are already cut up and waiting for me to have a moment of time to actually get my Singer out and sew them together...